


Do you ever find yourself gazing at your furry companion, admiring their adorable ears? Have you ever wondered how to keep your dog's ears clean and healthy at home?
Well, you're in luck because we at RexiPets have the answers to all your ear-related questions right here!
From learning how to clean dogs ear at home to knowing how often you should perform this task, we have you covered.
So, are you ready to embark on this journey of discovery? Grab your furry friend, gather all your enthusiasm, and let's dive headfirst into the captivating world of dog ear cleaning.
How To Understand That Dogs' Ears Need To Be Cleaned?
It's important to know when your dog's ears need cleaning. While every dog is different, some common signs can indicate it's time to give those ears a good clean:
- If you notice a foul smell coming from your dog's ears, it could indicate an infection or excessive wax buildup.
- Look out for any unusual discharge, such as pus or excessive wax, coming from the ears. Discharge is usually a sign of infection or other underlying issues.
- Suppose your furry friend constantly scratches at their ears or rubs them against furniture or the floor. In that case, it may indicate that their ears are itchy or uncomfortable.
- Look closely at your dog's ear flaps and the inner ear. If you notice redness, inflammation, or swelling, it may indicate an underlying problem that requires attention.
- Dogs often shake their heads to relieve discomfort or to dislodge debris from their ears. However, observing frequent or vigorous head shaking could indicate the need for ear cleaning or an infection.
How Often Should You Clean Your Dog's Ears?

There's no one-size-fits-all answer to this ear-cleaning conundrum because every dog is unique, just like humans. Some dogs are more prone to wax buildup and require more frequent ear cleaning, while others might only need the occasional cleaning session.
But don't worry; we have general guidelines to help you navigate the wonderful world of dog ear cleaning.
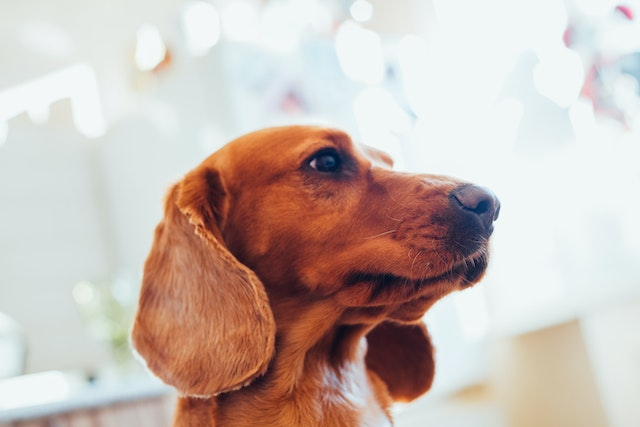
Let's start with those adorable floppy-eared pals like beagles and cocker spaniels. Their floppy ears tend to trap moisture, creating a cozy environment for bacteria and yeast to throw a party.
To prevent unwanted ear infections, cleaning their ears regularly is generally recommended. You might want to aim for once a week, but it's always a good idea to check with your vet to be sure. On the flip side, dogs with pointy ears have better air circulation, so they usually require fewer cleanings.
Now, if your dog loves to swim, their ears might need extra attention. Regular swimming can lead to more moisture buildup, so it's wise to give their ears extra love and cleaning if they're big swimming enthusiasts. And suppose your furry friend has a history of pesky ear infections or allergies. In that case, you should also bump up the regular ear cleaning frequency.
No matter the shape or size of your dog's ears, it's always a good idea to consult your veterinarian for personalized advice. They'll be able to guide you on how often and how to clean your specific pup's ears. Remember, they're the experts!
Generally, aim to clean your dog's ears once a week to every two weeks to keep those infections at bay.
How To Clean Dogs' Ears At Home?

Here is how you can clean your dog's ears:
Things you will need
Here are some essential items you'll need for cleaning your dog's ears:
- Licking mat
- Cotton balls
- Towel
- Dog ear cleaning solutions
- Dog ear wipes
Gather all your supplies, and let's dive into the step-by-step guide on cleaning your dog's ears at home.
Step 1 - Get a helper
If your dog tends to get anxious during ear cleanings, having a trusty sidekick to lend a helping hand is a great idea. Find someone your pup knows and adores to be their official ear-cleaning assistant.
This special helper's job is to gently hold or keep your dog in place while they enjoy the delightful distractions from the licking mat. It's all about making the experience stress free for your furry friend.
So, let your helper offer some tasty treats, dog toys, or engage your dog in their favorite activities to keep them happy and relaxed while you work your magic on their ears. Having a familiar face by their side makes your dog feel more at ease and less likely to squirm or fuss.
Step 2 - Apply the ear-cleaning solution
When applying the dog ear-cleaning solution, there are two safe and effective methods. The first method involves squeezing the ear wash solution directly into the ear canal and gently filling it with the solution. This method allows for direct contact with the ear and thorough cleaning.
Alternatively, suppose your dog is particularly fidgety or fearful of the solution squirting into their ear. In that case, you can opt for the second method. This involves saturating a cotton ball with the ear-cleaning solution and placing it at the upper opening of the ear canal. This way, the solution can gradually seep into the ear while breaking up any gunk or debris. It's an excellent option for dogs who need ear wash solutions with a more gentle and stress-free approach.
Step 3 - Clean dog ears
Use a veterinarian-approved cleaning solution and fill your dog's ear canal with it. Then gently massage the ear's base for around 30 seconds. A squishing sound will come when the solution dislodges the buildup and debris. Don't let the applicator's tip touch your furry friend's ear. This can cause bacteria to accumulate.
This massage helps distribute the solution and break up any wax or debris.
Alternatively, if you opt for squirting the solution directly into the ears, use your fingers to gently massage the base of the ear. Do this for about 30 seconds. This massage helps ensure the solution reaches all areas of the ear canal and aids in loosening any accumulated gunk.
After the massage, it's common for dogs to shake their heads. This is their natural way of removing excess moisture and debris. Allow your dog to shake, and then use a fresh cotton ball to gently wipe and clean the ear canal and the outer ear flap.
Step 4 - Dry them out
Once you have cleaned your pet's ears with the ear solution, it is essential to thoroughly dry them. Take a clean cotton ball or cotton round and carefully wipe out any remaining solution and debris from the upper ear canal and ear flap. This step is crucial to remove excess moisture and prevent any potential discomfort.
After drying the ears, show your pup affection and consider giving them another treat to reward their cooperation. If you still need to clean the dog's other ear flap, repeat the process with the same care and attention.
How Can You Know If Your Dog Has An Ear Infection?
Regularly caring for your dog's ears keeps them clean and allows you to become more in tune with their overall health. You'll observe your pup's behavior during the ear-cleaning process and detect any signs of trouble.
Ear infections in dogs can manifest in various ways, and being aware of the following symptoms can help you identify an ear infection.
-
Discharge
Keep an eye out for any unusual discharge coming from your dog's ears. It could be a sign of infection or inflammation.
-
Odor
A strong or unpleasant odor emanating from the ears is another possible indicator of an ear infection.
-
Head shaking
If your furry friend starts vigorously shaking their head more frequently than usual, it could be a sign that their ears are bothering them.
-
Ear scratching
Excessive scratching or pawing at the ears is common in dogs with ear infections or ear mites. They may show signs of discomfort or itchiness.
-
Rubbing ears on surfaces
If you notice your dog rubbing their ears along carpets, furniture, or other objects, it could be an attempt to relieve itchiness or discomfort caused by an ear infection.
-
Excessive debris
Pay attention to the amount of debris accumulating in your dog's ears. An excessive buildup of wax or debris may be a sign of an underlying issue.
You can promptly seek veterinary care if needed by being vigilant and recognizing these symptoms. Early detection and treatment are crucial in ensuring your pup's ear health and overall well-being.
Final Words!
Knowing how to clean your dog's ears at home is integral to their grooming routine. By following the proper steps and using tools for cleaning dog's ears regularly, you can effectively clean a dog's ears and remove wax and debris. And you can stop any dog ear infections that may occur.
Remember to be gentle and patient throughout the process. Pay attention to any signs of discomfort or ear-related issues, such as discharge, odor, scratching, or head shaking, as these may indicate a problem that requires veterinary attention.
Consult with your veterinarian to find the appropriate frequency of ear cleaning for your dog, as it can vary based on their individual needs and characteristics.